Blog
So you’ve downloaded CallApp, congratulations!
You’ve made a great decision that you surely won’t regret. But in order for you to really enjoy our incredible app, we want to make sure that you know how to get yourself set up in order to start enjoying all of our unique features. We’ve done everything possible to ensure the most user friendly experience possible, and if you ever have any questions along the way, our support team is always here at your service!
Here are the simple steps you’ll need to take to set yourself up once you’ve downloaded CallApp in the playstore.
1.The first and most simple step is to click on the CallApp icon, it should be among the rest of your mobile apps.

2.Once you’ve entered CallApp, choose 1 of 3 sign up methods – either with your phone number, Facebook or Google account.
Please note: Be sure to approve CallApp as your default dialer in order to enjoy all of our advanced features. If you sign up with Google or Facebook, you will be able to choose which of your accounts to register with through the Facebook login page.
3.Once you’ve signed up, please allow permissions to your contacts, as well as media and files in order to enrich your calling experience.
Don’t worry – these permissions really just allow us to offer you a more personalized app. Your information isn’t being shared with any external parties and we will never send emails in your name.
4.If you’ve registered with your phone number, be sure to confirm your number. We will send you an SMS confirmation code – we try our best to copy it automatically for you, but if it doesn’t work you’ll need to copy the code. Please note: If the SMS code you receive doesn’t work, please use our ‘call back’ option to confirm your number. There’s no need to actually answer the call.
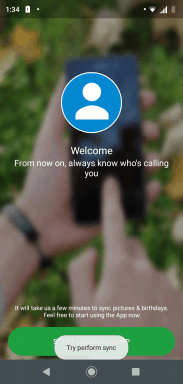
5.Now that you’re registered, it’s time to sync up with social networks in order to see exciting updates from your friends and family – putting everything in one organized place for you.
6.You’re just one step away from finishing! You now have the choice whether or not to go premium and enjoy an ad-free experience with additional features.
7.Now press start using CallApp ????
8.In some cases we will ask you to allow us permission to “draw over apps” in order to be able to draw the screens.
How do I do this?
Press allow – the settings page will open, select CallApp and turn the toggle on. Good to go!
9.All of your contacts will appear on your new CallApp screen – select the clock symbol to see your past call history with your friends and family.
10.You can now select the ‘GIFT’ box to take a short tutorial of everything CallApp has to offer, and yes – receive a free gift too! We’re grateful for your loyalty and want to provide you with a warm welcome to an app that’s going to change your life.

11. And last but certainly not least, what’s left is to enjoy all of CallApp’s unique features from identifying calls, blocking calls, recording calls, customizing calls and much, much more! Don’t forget – our support team is always here to answer your questions, ensuring that you have nothing less than the best possible calling experience yet!
Note: It’s most important that you allow the ‘Draw over other apps’ permission in order to have the Caller ID feature work.


Continue reading


CallApp for Business, Bringing Verified Caller ID
There’s no doubt in the world that you’ve received a spam or scam call.

Fighting Spam Across Borders
There’s no doubt in the world that you’ve received a spam or scam call.